Creating a photo evaluation task
Please Note: Training is hidden in the application up to version 1.55. TakeTask is working on rebuilding the command in order to achieve stability on many devices. Unfortunately there is no alternative way to use this feature until version 1.55 is released. Tasks running on this function remain unchanged, it is not possible to create new tasks using this function until version 1.55.
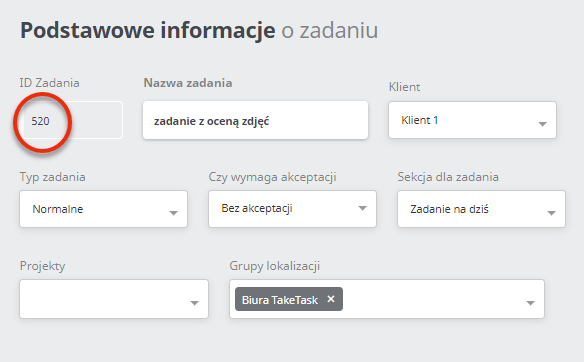
To create a new task with photo evaluation, you need to create a new task. After saving the project you should copy its ID number.

Next, go to the application settings then 'Application parameters' and find the "RatePhotosTaskIDs" setting and enter the ID of the task to be evaluated.

Task Generator
The photo evaluation task should consist of a rating command.
In the Task Generator, where users can take photos, remember to set a checkbox to be evaluated in the Take Photo command, otherwise it will not be possible to rate photos. Please Note: The setting does not work in reverse, only photos taken from the moment this checkbox is ticked will be sent for evaluation.
Appearance within the mobile app
An example of the view in the mobile application of a photo evaluation task:
- Task to rate photos.
- Swipe the photo to the right (accepted).
- Swipe the photo to the left (rejected).
More about how to carry out the task via the mobile app can be found in the 'mobile app' section.
If this is the first photo evaluation task created in the app, you should also run the appropriate server setting, which will allow you to check the status of the photos "live". Otherwise, rejecting one of the photos will leave the task in "For Verification", it will not be rejected. Please contact us for help with the first photo evaluation task.
OPTIONAL CONFIGURATION
Strap above the rated photo
An additional configuration possibility is the option to format the content of the top bar displaying information about the evaluated photo.
The configuration of this bar is done by inserting variables into the appropriate field in 'Application Configuration' in the panel.
Below is a field for inserting variables with two variables placed as an example.
The following variables can be used for configuration:
- {date_completed_task} - Enables inserting the date of task completion.
- {date_hour_completed_task} - Allows to insert the date and time of task completion.
- {command_title} - Allows to insert the title of the command where the photo comes from.
- {user_login} - Enables inserting the login of the user who took the photo.
- {user_first_name} - Enables inserting the name of the user who took the photo.
- {user_last_name} - Enables inserting the name of the user who took the photo.
- {location_name} - Enables inserting the name of the location where the photo was taken.
In order for values to be displayed in the app separated by a break, a space must be inserted between variables in the configuration bar.
The order in which the variables will be inserted will be reflected in the order of values displayed in the mobile app.
Below is an example of a bar containing variables:
{date_hour_completed_task} {location_name} {user_first_name}
This means that in the bar you can see the date and time the task was completed, the name of the location where the task was performed and the name of the user who carried out the task.
Mechanism for rejecting and accepting tasks
When you evaluate photos, whole tasks are accepted or rejected based on this acceptance/rejection. This procedure can be based on one of three rules, which can be selected in the 'Application Configuration'.
Rule number 1: An task status is changed to 'rejected' when at least 1 of its photos are rejected.
Example: In task X the user took 3 photos, his supervisor rejected 1 photo and accepted 2 photos. The task status changes to "Rejected".
Rule number 2: A Task status is changed to 'accepted' when at least 1 of the photos from the given task has been accepted.
Example: In task X the user took 3 photos, his supervisor accepted 1 photo and rejected 2 photos, so the task status is changed to "Accepted".
Rule number 3: A Task status is changed (accepted, rejected) only when each of the photos from a given assignment gets the same rating, i.e. is accepted or rejected.
Example 1: In task X the user took 3 photos, his supervisor rejected all 3 photos during the evaluation, so the task status is changed to "Rejected".
Example 2: In task X the user took 3 photos, his supervisor accepted all 3 photos during the evaluation, so the task status is changed to "Accepted".
Example 3: In Task X the user took 3 photos, his supervisor accepted 2 photos while evaluating the photos and rejected 1, the task status is unchanged and remains with the status "For verification".


- RatePhotoRejectWhenAtLeastOneRejectedPhoto - Rule number 1
- RatePhotosAcceptWhenAtLeastOneApprovedPhoto - Rule number 2
- None of the checkboxes are ticked - Rule number 3
The default rule is rule number 3.
Update 2.57
The possibility of entering comments on the photos of Delta and Planograms
It is possible to add comments by the station taking the photo, to the view for CM and TM acceptors.
The possibility of commenting, occurs while taking the photo. It is displayed in the mobile app, at the bottom of the window.
The comment appears next to each photo, depending on the command it comes from.
Those with the authorisation approve or reject the photo when seeing the comment added by the station.


